%20final_edited_edited.png)
Merry Crochet Earring Christmas!
- Dec 25, 2018
- 4 min read
Updated: Aug 2, 2024
Here is my little gift to you for Christmas. You can whip up these small ear rings in no time! Maybe you will be inspired to make them as a gift for someone else? Scheepjes Maxi Sweet Treat is perfect for a small motifs. It's no surprise that I Loooooove Maxi - which of the 87 colours would you use?

This is a good little example of stiffened crochet, whether it be for a Christmas tree decoration, earring or something 3-dimensional, the principle would be the same.
I am blogging on the go just now (visiting my family on the south coast of Western Australia), and don't have access to photoshop, so for this blog all my photos and text are separate.
I used a Tulip Etimo 1.75mm hook and Maxi Sweet Treat 401 Dark teal. You will also need 2 shepherd hook ear ring findings, 4 jump rings and two sets of small jewellery pliers (see photos towards end of blog), and some fabric hardener (see below).
Here is the Stitch Chart:

Rounds 1 & 2 are worked on the Right Side, then turn and Round 3 of slip stitch is worked on the Wrong Side to stabilise the fabric from cupping forward, and to give it a ridged edge. The 2trBLO create a ring of little holes in the disc shape behind the ridge of unworked loops on the Right Side. I like using these little sorts of details in my designs. The first Ch3 of Rounds 1 & 2 count as the first tr of that round, and the first Ch1 of Round 3 counts as the first ss. At the end, cut the tail and pull the tail gently up through the top of the last ss rather than the conventional fasten off technique (see below).

This is the Wrong Side view of the completed motif, showing the tails. I sew the starting tail in around twice in the donut shape made by the bottoms of the initial trebles, (but don't fuss too much because the fabric hardener will help keep your tails when you sew them. As long as they are hidden in the "donut" and don't show on either side it will work well). For the finishing tail, I do a Secret Sew Finish (see previous blog entry CT#2) over the ch1 at the start of Round 3, into the first ss and back again before sewing the tail under the ridge of ss in a barber pole fashion.
Here is the Right Side view:

There are a number of fabric hardeners on the market, I have tended to use Powertex, which I believe is available worldwide. It comes in various colours and is used for artwork as well as fabric/mixed media sculptures. This is a close up photo of the label on the front of my Powertex bottle. The "white" Powertex and the "transparent" Powertex both look white in the bottle, so make sure you get the transparent version!

Wear (plastic disposable) gloves and make sure you are in a well ventilated area to use fabric hardener. Powertex will stick to anything except plastic, so I place a plastic sheet down on my work surface and pour about a tablespoon amount of Powertex into a flat bottomed plastic bowl.

Thread a large tapestry needle through the ch-3 space at the top of the motif to make the central hole more obvious (top right of the disc on this image). Wooden skewers are handy to float the motif on the Powertex, lightly tapping to make sure all parts of the back contact the liquid.

Remove the disc from the Powertex and press flat into the plastic sheet with your gloved fingers to saturate the disc, then pick it up and move it to a new bit of the plastic and press again. (The idea is to saturate the fabric but not have excess fabric hardener clogging up the finished product, which is also why I float it then press rather than dunk into the liquid). They look a bit weird and you have a panic moment because it looks white, but it will be okay...

Wooden skewers are great to swizzle through the hole in the ch-3 space, and hang the flattened discs to dry. It may take 1-3 hours depending on ambient temperature to dry completely, but rotate the skewers once or twice before they dry completely or the Powertex will glue the disc to the skewer!

The hardware: These are some stirling silver 3mm jump rings (bottom centre), and shepherd hooks. Two sets of small pliers are needed to open and close the jump rings to join the motif to the hook. Fingers are useless - definitely two sets of small jewellery pliers.
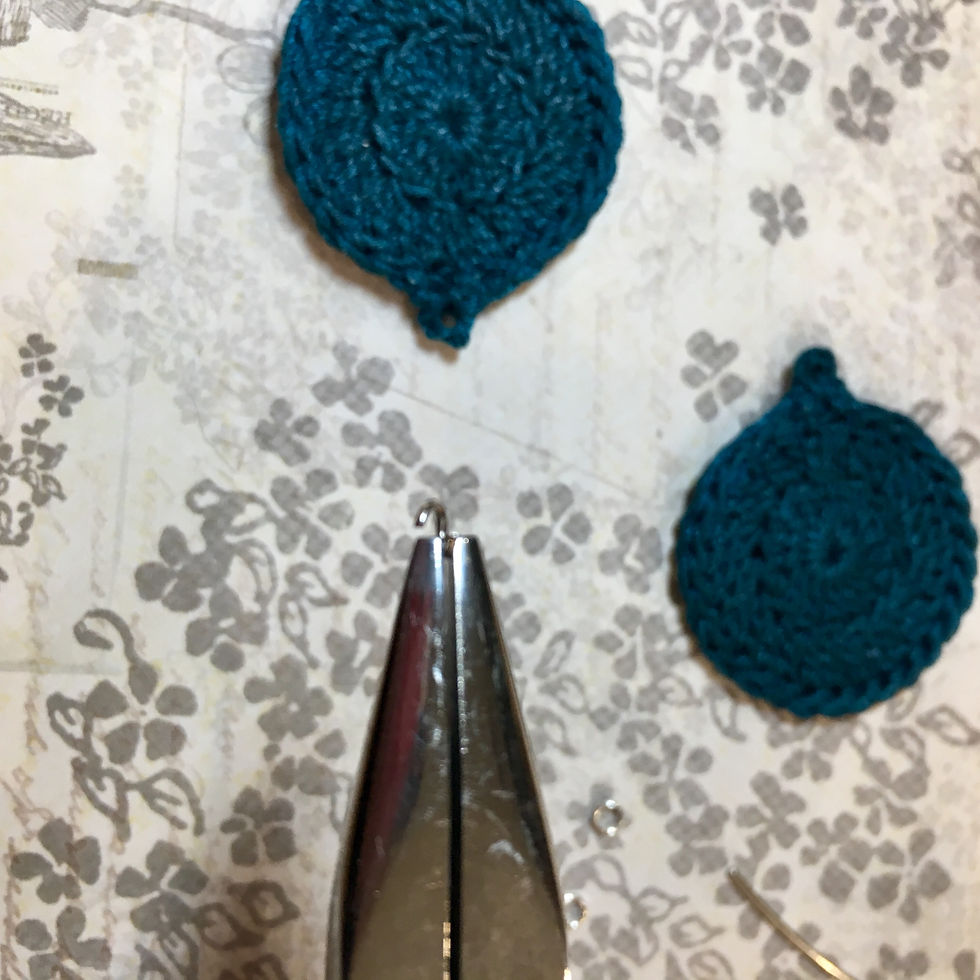
Not the best photo sorry, but it does show how to open the jump ring in a side-to-side motion (don't hinge it open). Thread it through the ch-3 hole on the motif then close the ring. Use a second jump ring to thread through both the first jump ring and the shepherd hook. This is fiddly but produces a good finish.
I hope you have a happy festive time with your loved ones on this Christmas Day! I am fortunate to be with my extended family, about to share breakfast before putting the turkey on to roast, pouring some champagne and settling in around the Christmas tree for gift giving ritual :)
Thank you for your support and interest in my crochet!
Love
Susannah (Peppergoose)

#peppergoosedesigns #peppergoosehandmade #crochetearrings @scheepjes #maxisweettreat #freechrochetpattern #scheepjesmaxi #crochettutorial #christmasgifttoyou #threadcrochetmotif #crochetjewellery #crocheteveryday #powertex #crochetgift


Comments