%20final_edited_edited.png)
Free Pattern - The #allspicebeanie
- Feb 4, 2021
- 5 min read
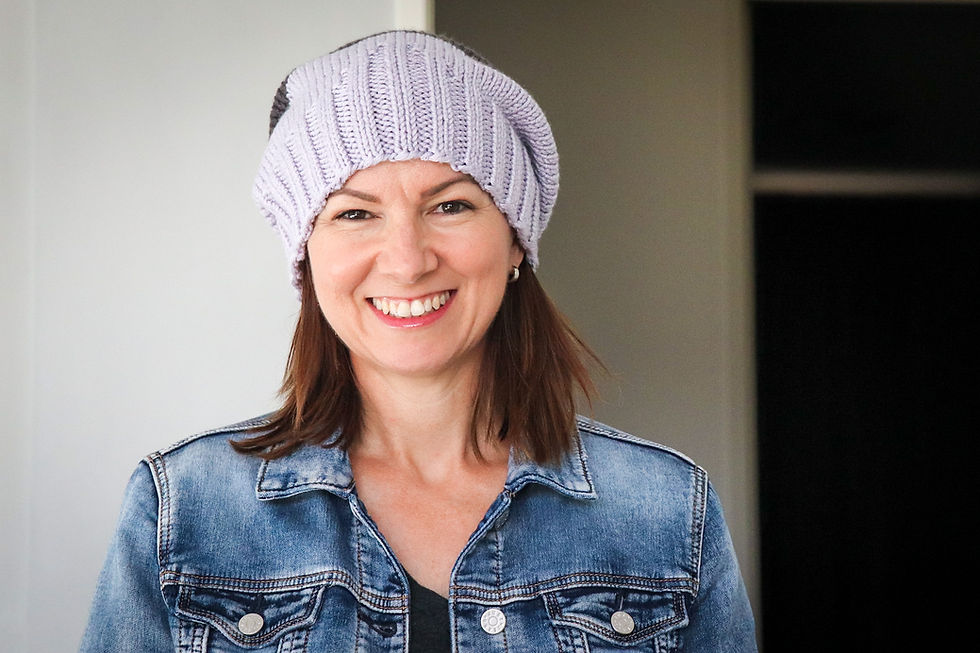
Sized for all kinds of people toddlers, children, teens and adults - who will you make the Allspice Beanie for? Allspice is nice quick and squishy knit project that you can make in a weekend with Scheepjes premium 100% acrylic yarn Chunky Monkey and some circular knitting needles (or double pointed needles if your prefer) as its worked bottom up in the round.
The pattern is FREE to enjoy here on my blog!
You also have the option to buy the ad-free PDF download for the Allspice Beanie from my Peppergoose Design Pattern Stores on Ravelry or Etsy for a small fee if you would like to support my design work.
Difficulty Level / Skills Required / Techniques Used
Skill level suits an adventurous beginner to intermediate knitter. Techniques include long tail cast on, knit, purl, right leaning decrease & cast off.
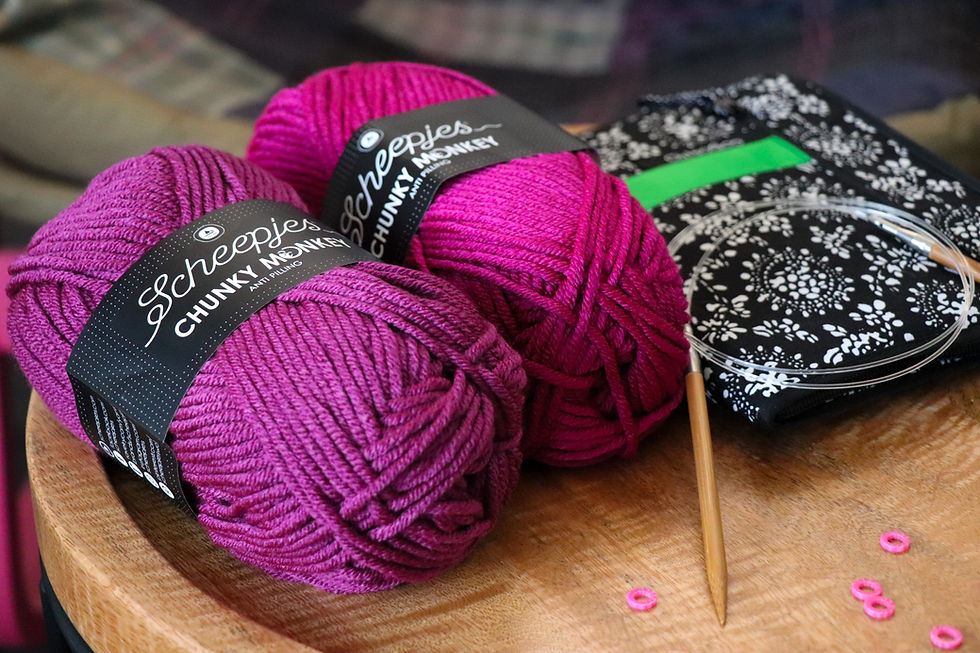
Materials
Yarn A
Scheepjes Chunky Monkey (100% Premium Acrylic – antipilling; 100g/116m)
Colour: 2009 Mulberry x 1 (1: 1: 1: 1: 1: 1: 1) balls
Yarn B
Scheepjes Chunky Monkey (100% Premium Acrylic – antipilling; 100g/116m)
Colour: 1061 Cerise x 1 (1: 1: 1: 1: 1: 1: 1) balls
Note: If using 1 colour you will need 1 (1: 1: 1: 2: 2: 2: 2) balls.
Yardage allowance for all sizes includes enough yarn for 1 swatch to check gauge
(approx. 20g/swatch)
Needles
4.00mm circular needles 80-100cm (32-40in) (for all ribbing)
5.00mm circular needles 80-100cm (32-40in) (for stocking st main fabric)
(Or 4mm & 5mm sets of double pointed needles)
Note: Baby-Child size makers may prefer 60cm circular needle
Other Materials
5 x Stitch markers
Tapestry needle (to use with yarn)
Scheepjes Chunkey Monkey is available in 93 colours from Scheepjes retailers worldwide, and if you purchase yarn through these affiliate links* below, it does not cost you any extra and I receive a small percentage of the sale.
Thank you for your consideration!
Wool Warehouse (in the UK - ships worldwide)
Caros Atelier (The Netherlands)
Gauge/Tension
16 sts and 20 rows of Stocking Stitch to measure 10cm x 10cm (before and after blocking) using 5mm needles (or needle size required for gauge).
Note: This is tighter than the ball band gauge for it's purpose as a hardwearing hat.
A 15 x 15cm swatch of stocking stitch to check your gauge should use approx. 20g of Chunky Monkey. Note: This is tighter than the ball band gauge for its purpose as a hardwearing hat. If your swatching attempts are still looser than mine, consider making a smaller size to compensate.
NOTE:
Since this is a small project I know many makers will probably go straight to making the beanie without swatching - so just bear in mind I have used a tight gauge - If you know you are always a relaxed knitter then consider making 1-2 sizes smaller. The main risk with making this beanie is that it might turn out too big or small. Given its a chunky yarn and a small hat, the difference of 1st per inch in gauge will cause a significant difference to the final measurements of the finished project. Since Chunky Monkey is acrylic and not elastic, err on the side of making the smaller size if you are unsure choosing between 2 sizes.
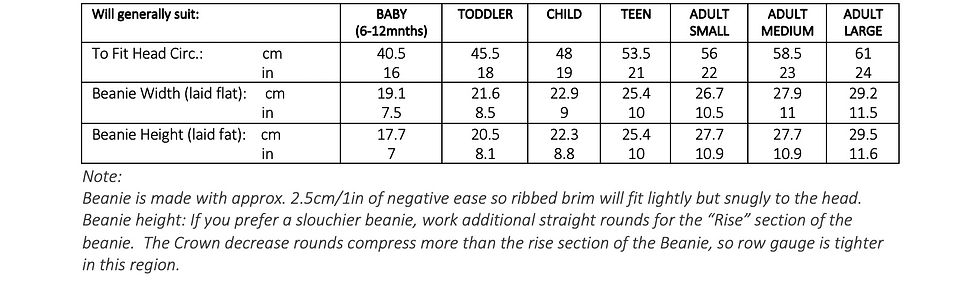
Measurements
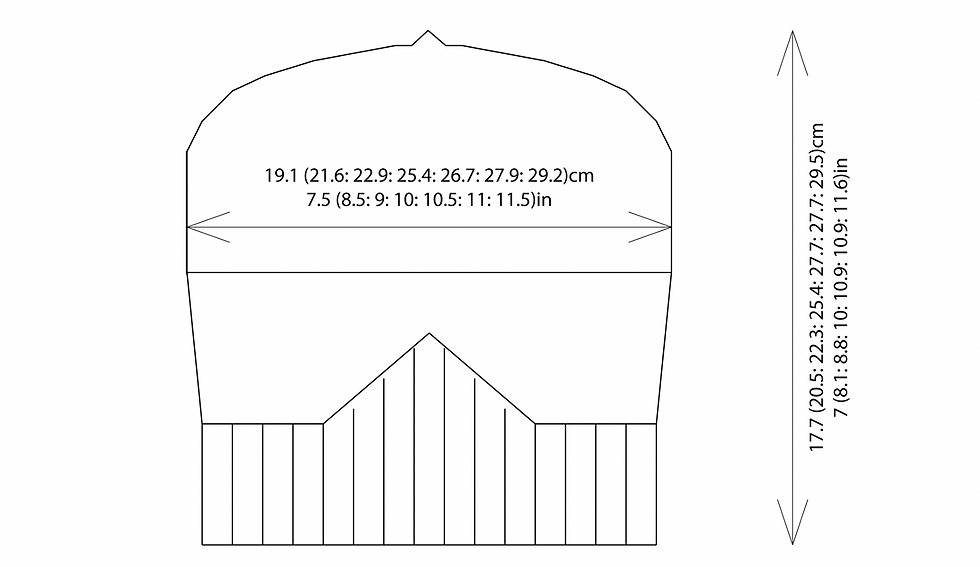
Schematic 1 – Completed Beanie Laid Flat
Abbreviations
[ ] number of sts on a given row/round
approx. approximately
beg beginning
BOR Beginning of Round
cont continue
dec decrease
k knit
k2tog knit 2 sts together: insert needle kwise into next 2 sts and knit them together (right-slanting dec)
kwise knitwise
p purl
patt(s) pattern(s)
PM(s) place stitch marker(s)
prev previous
rem remains/remaining
rep(s) repeat(s)
rm(s) remove stitch marker(s)
RS right side
sm slip marker
sl1p slip 1 st pwise
st st stocking st: RS knit, WS purl
st(s) stitch(es)
tog together
WS wrong side
Pattern Notes
Beanie is constructed bottom up in the round starting with a 2 x 2 rib with 4mm needles, then 5mm needles are used for remainder of hat. A small section of ribbing texture extends into the stocking st of the body of beanie as a small detail worked over the next 8 rounds. The hat continues straight for a few more rounds before the second colour is used to complete the remaining straight rounds of the “rise” of the hat. Height adjustments can easily be made in this section if desired. The crown is shaped with rapid decreases and the tail sews together the few cast off stitches that remain.
Instructions
With 5mm circular needles and Yarn A, cast on 60 (68: 72: 80: 84: 88: 92) sts using long tail or preferred cast on method.
Change to 4mm circular needles.
RIBBING:
Round 1 (RS) (K2, p2) to end, join to work in the round, PM for BOR. [60 (68: 72: 80: 84: 88: 92) sts]
Beanie is constructed in the round on RS of work as continuous spiral. M keeps track of BOR which will be left side of Beanie – sm at end of each round.
Round 2 (RS) (K2, p2) to end.
Round 2 forms 2 x 2 rib.
Work a further 8 (10: 10: 12: 14: 14: 14) rounds in 2 x 2 rib.
Change to 5mm circular needles for all rem rounds.
It's a good idea to try your brim on at this point to see if it’s about the right fit with light pressure but not loose on your head - or however you like your beanies to feel when worn).
FEATURE RIB TRANSITION DETAIL
Round 1 K11 (11: 11: 15: 15: 15: 19), PM, p1, (k2, p2) twice, k2, p1, PM, k to end (Note: 37 (45: 49: 53: 57: 61: 61) sts rem).
Round 2 K to m, sm, p1, (k2, p2) twice, k2, p1, sm, k to end.
Round 3 As Round 2.
Round 4 K to m, rm, k3, PM, p2, k2, p2, PM, k3, rm, k to end.
Round 5 K to m, sm, p2, k2, p2, sm, k to end.
Round 6 K to m, rm, k1, PM, p1, k2, p1, PM, k1, rm, k to end.
Round 7 K to m, sm, p1, k2, p1, sm, k to end.
Round 8 As Round 7 (rms except BOR).

RISE
The “rise” is the straight section of a hat/beanie - make any height/length adjustments here.
Work straight in st st: K 5 (5: 6: 6: 7: 7: 8) rounds.
Change to Yarn B
Round 1 K to end.
Round 2 Sl1p (slip the first st purlwise - to reduce the colour change “jog”), k to end.
Work straight: K 4 (7: 9: 13: 14: 14: 16) rounds. Include 0 (2: 0: 2: 0: 4: 2) evenly spaced decs in the last round (using k2tog) to convert st count to a multiple of 6. [60 (66: 72: 78: 84: 84: 90) sts]
SHAPE CROWN: (dec rounds)
Round 1 * K8 (8: 10: 11: 12: 12: 13), k2tog, rep from * to end. [54 (60: 66: 72: 78: 78: 84) sts]
Round 2 * K7 (7: 9: 10: 11: 11: 12), k2tog, rep from * to end. [48 (54: 60: 66: 72: 72: 78) sts]
Round 3 * K6 (6: 8: 9: 10: 10: 11), k2tog, rep from * to end. [42 (48: 54: 60: 66: 66: 72) sts]
Work in est dec patt: as described in prev 3 rounds, working 1 fewer k sts between k2tog decs for each subsequent round for 6 (7: 8: 9: 10: 10: 11) more rounds, finishing with 6 sts (all sizes).

Final Round (all sizes) K2tog 3 times.
Cast off knitwise. Cut yarn, pull yarn through and sew tail through cast off sts to cinch top of the beanie tog, sewing back and forth as necessary to make a small neat bump at the top of crown before weaving in tail at WS of work.
To Finish
Weave in all tails on WS of work, wet block to measurements indicated in schematic (accounting for any height/length adjustments you may have made in the Rise), lay flat to dry.
I hope you enjoyed making my little project! If you would like to purchase the ad-free PDF version for a small fee head to my Peppergoose Design Stores on either Ravelry or Etsy and you will find it there along with lots of crochet designs and a little knitted bag. It's great if you would please tag me in your pics on social media and use the #allspicebeanie so I can see your hats!
Susan (Peppergoose)

#peppergoosedesign #scheepjes #peppergoosehandmade #chunkymonkey #aranyarn #freepatterncoming #knitting #knitexperiment #chiagoo #debondt #australiandesigner #maker #handmadeisbest #yarntherapy #cerise #mulberry #beaniepattern
*This post contains affiliate links.
** Yarn support provided by Scheepjes


Love that fuchsia color! Nice work! Will be giving this one a go when I have some extra time.